Unit testing JavaScript Applications - Part 1
May 16, 2020
As developers, a lot of the time we find writing unit tests for our application to be a daunting task, which we would prefer not to do. Considering that writing tests doesn’t really have any business value either, it becomes even easier to postpone writing the tests for your application till much later. However we know that writing tests have a number of benefits that become more apparent as the project grows in complexity and the team working on the product increases in size, or goes through an organizational restructuring. In this series, we would be looking at writing unit tests for JavaScript applications.
What is Unit Testing?
Unit testing refers to writing tests that verify that a piece (unit) of code behaves as the author intended, giving a set of inputs in all conceivable conditions. Unit tests always tests the piece of code in isolation, without any external factors or dependencies influencing the code. When thinking about unit tests, it helps to think about the unit of code in terms of a function.
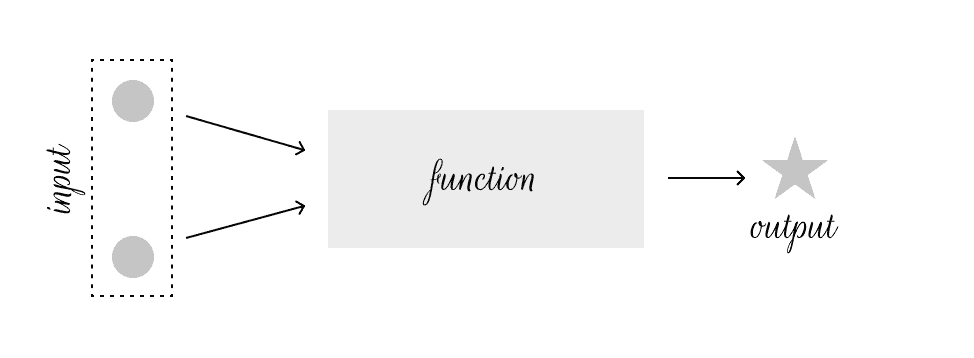
In its simplest form, a function accepts a set of inputs, performs some computation based on the inputs, and returns some output. Let’s create a simple function called sum() which takes two numbers and returns their sum as an output.
const sum = (a, b) => a + b;

const output = sum(2, 3);// expected output -> 5
From my perspective as a user of this function, I don’t really care how the sum() function decides to compute the output. All I care about is that: if I provide 2 and 3 as the inputs, sum() should return 5 always, no matter how many times I run it. The sum function could have been written a different way to compute the output, but as long as the output is the same, then the function still does what it was intended to do.
// a random contrived implementation of sum
const sum = (a, b) => {
  let output = a;
  const isAdd = b > 0;
  b = Math.abs(b);

  while(b > 0) {
    if (b >= 1) {
      if (isAdd) {
        output++;
      } else {
        output--;
      }
      b--;
    } else {
      if (isAdd) {
        output += b;
      } else {
        output -= b;
      }
      b = 0;
    }
  }
  return output;
}

const output = sum(2, 3);
// expected output -> 5
Unit testing comes with a number of benefits as well:
- you can change (refactor) your code confidently when you have solid unit tests that cover all the requirements in place.
- you end up writing better code as a result of writing unit tests. Some approaches to coding are very problematic when you need to write unit tests. In order to write tests, you need to write modular code with clear explicit dependencies (more on this later).
- your code is more reliable as it has tests covering the requirements.
- the test cases provide some form of living documentation about your code. Test cases describe the various requirements your code handles, and gives examples of how to use your code in form of the tests.
Pure Functions
When a function always returns the same output everytime for a given set of inputs, and it doesn’t change anything else outside the scope of the input and output, then that function is called a pure function. However if the function changes anything else (like mutating a referenced variable, performing I/O operations e.g. saving file to disk, making a network request, modifying the DOM), the function is no longer pure. The reason why this concept is important is because it is easy to predict the behavior of a pure function when using it than an impure function. Also it is very easy to test pure functions without much complexity or knowledge of the internal workings of the function. Let’s write a sum() function that is not pure to compare with our previous versions.
// Already loaded https://cdn.jsdelivr.net/npm/add@latest/index.min.js on the page
const sum = (a, b) => {
  return window.add([ a, b ]);
};

const output = sum(2, 3);
// expected output -> 5
This function still returns the correct output, but it relies on an external function (window.add()) existing for it to function. The function no longer depends on only the input parameters, but it also depends on the existence of an external factor, and that the external factor actually returns the right output.
If we want to unit test this function, remember we need to test the function in isolation. When running a test for the sum() function, we don’t want to be executing code in the window.add() function. We only want to execute and test the code in the unit of code we are testing, which is the sum() function in this case. For us to write the unit test, we would need to mock the window.add() dependency.
Mocking Dependencies
Mocking simply refers to replacing the actual implementation of a piece of code with a fake one that resembles the original one, and behaves like the original one. This is usually done to avoid executing the actual piece of code while trying to test another piece of code. In the example above, we want to test the sum() function without executing code in the window.add() function. This adds a major complexity to the unit testing process because you would need to rely on specialized tools and testing frameworks to be able to mock dependencies easily. This can be one of the most painful parts about writing unit tests, if the code structure for your piece of code depends on several external factors, especially if those external factors aren’t passed into the function as input parameters, but instead are accessed directly from a global scope from inside the piece of code.
In the impure sum() function example, the function access add() directly from the global window object. Like we mentioned above, this increases the complexity of the tests. A way to make it easier to mock the dependency would be by passing the dependencies as input parameters as well before using them.
// Already loaded https://cdn.jsdelivr.net/npm/add@latest/index.min.js on the page
const sum = (windowObj, a, b) => {
  return windowObj.add([ a, b ]);
};

const output = sum(window, 2, 3);
// expected output -> 5
Here, we are passing the window object as one of the parameters of the sum() function. Now it is easier to mock the window object, by just creating a fake object that behaves the same way as the window object.
const sum = (windowObj, a, b) => {
  return windowObj.add([ a, b ]);
};

const w = {  add(arr) {    return arr[0] + arr[1];  }};const output = sum(w, 2, 3);
// expected output -> 5
As you can see, we created a fake object that also has an add function. Now we have easily mocked the window object. Also we were able to make the sum() function pure again, since it only depends on its inputs and doesn’t modify anything outside of itself. Of course if the add() function used is an impure function, that would also make the sum() function impure, since purity of a function is transitive.
Whitebox vs Blackbox Testing
Generally speaking, there are two categories of testing: whitebox and blackbox testing. Whitebox testing refers to tests that depend on the tester having knowledge about the way the piece of code being tested works internally. Blackbox testing is the opposite. The person writing the tests can be unaware about the way the piece of software functions internally.
Unit testing is an example of whitebox testing and is usually written by the author of the code. As the author, you are usually aware of all the conditions, and logical flows of execution within the code, and so you are able to write tests with all possible combinations of inputs to test all the execution flows. Remember the definition of unit testing: writing tests that verify that a piece (unit) of code behaves as the author intended, giving a set of inputs in all conceivable conditions. You want to make sure all the execution flows are tested to avoid any unexpected behaviors when the piece of code is being executed in a production environment. Also note that I said “all conceivable conditions”. This is because there can be an infinite combination of inputs that your piece of code would be executed with, and your test cases might not cover all these combinations. There could be some edge cases that aren’t obvious when writing the code and which aren’t covered by the tests but would show up when the code is in use. Usually when that happens, you should add a new test case to cover such a case.
When writing unit tests, I like to think about the piece of code from both the blackbox (how the users would see it) and the whitebox perspectives:
- I think from a blackbox perspective when determining the inputs and outputs of the piece of code to test, and I use that to create the test cases.
- I think from a whitebox perspective when I need to mock dependencies, since we need knowledge about the internals of the piece of code in order to be able to mock the dependencies.
- I think from a whitebox perspective when I want to cover all the logical execution flows within the piece of code, and I use this to add extra test cases, making the test suite robust.
What should I know about TDD?
Test Driven Development (TDD) is an approach to development that involves defining test cases, and using those test cases to define what code needs to be written. According to Wikipedia,
Test-driven development (TDD) is a software development process that relies on the repetition of a very short development cycle: requirements are turned into very specific test cases, then the code is improved so that the tests pass. This is opposed to software development that allows code to be added that is not proven to meet requirements.
This means you end up writing your tests while writing the actual code, and you no longer have writing tests as a chore that you need to do at a later time. It also makes writing tests much easier, since you write your code with the tests in mind.
One of the benefits of the test driven approach is that it helps you write much better code with much cleaner code structure.
Following the TDD approach involves three laws that you need to follow:
- You must write a failing test before you write any production code.
- You must not write more of a test than is sufficient to fail, or fail to compile.
- You must not write more production code than is sufficient to make the currently failing test pass.
Red-Green-Refactor Cycle
The three laws of TDD gets expanded further into the Red-Green-Refactor cycle. This basically says:
- Create a unit test that fails (
RED ) - Write production code that makes that test pass (
GREEN ) - Clean up the mess you just made (
REFACTOR )
This is the cycle that defines the test-driven approach. You follow the cycle, then rinse and repeat.
A TDD Example
Let’s illustrate this using the sum() function again.
Step
We can start by adding a test that verifies that the sum() function runs without errors.
expect(() => sum(0, 0)).not.toThrow(); // expect sum() to not throw an errorNote: We add this test before importing, or even creating the sum function.
Outcome
[RED] As expected the test would fail, since it can’t find the sum() function.
Step
We create the sum() function to make the test pass.
const sum = (a, b) => {};
expect(() => sum(0, 0)).not.toThrow(); // expect sum() to not throw an error
Outcome
[GREEN] Now the test would pass since the function should execute without throwing any errors.
Note: At this point, there is no refactoring that can be done. So we skip and go back to the Red phase
Step
We add a new test case to check that the expected output of sum(0, 0) is 0.
const sum = (a, b) => {};

expect(() => sum(0, 0)).not.toThrow(); // expect sum(0, 0) to not throw an error
expect(sum(0, 0)).toBe(0); // expect output to be 0
Outcome
[RED] Once again, the test would fail since sum() returns undefined, and wouldn’t return 0.
Step
We update the sum() function to return the expected output
const sum = (a, b) => 0;
expect(() => sum(0, 0)).not.toThrow(); // expect sum(0, 0) to not throw an error
expect(sum(0, 0)).toBe(0); // expect output to be 0
Outcome
[GREEN] Now the tests would pass since the output is 0. I’m sure you can already tell that this isn’t solving all possible cases.
Step
Let’s add another test case to check that sum(2, 0) is 2.
const sum = (a, b) => 0;

expect(() => sum(0, 0)).not.toThrow(); // expect sum(0, 0) to not throw an error
expect(sum(0, 0)).toBe(0); // expect output to be 0
expect(sum(2, 0)).toBe(2); // expect output to be 2
Outcome
[RED] The test fails as expected, since the function always returns 0.
Step
Let’s add a condition to handle the 2 input.
const sum = (a, b) => {
  if (a === 2) {    return 2;  }  return 0;
};

expect(() => sum(0, 0)).not.toThrow(); // expect sum(0, 0) to not throw an error
expect(sum(0, 0)).toBe(0); // expect output to be 0
expect(sum(2, 0)).toBe(2); // expect output to be 2
Outcome
[GREEN]The test passes again given the new case. At this point we might choose to refactor the code a bit.
Step
Let’s refactor sum to return the value of a.
const sum = (a, b) => {
  return a;};

expect(() => sum(0, 0)).not.toThrow(); // expect sum(0, 0) to not throw an error
expect(sum(0, 0)).toBe(0); // expect output to be 0
expect(sum(2, 0)).toBe(2); // expect output to be 2
Outcome
[REFACTOR] The sum() function has been improved and the tests still pass. We go on with another test case.
Step
Let’s add a case for sum(2, 3).
const sum = (a, b) => {
  return a;
};

expect(() => sum(0, 0)).not.toThrow(); // expect sum(0, 0) to not throw an error
expect(sum(0, 0)).toBe(0); // expect output to be 0
expect(sum(2, 0)).toBe(2); // expect output to be 2
expect(sum(2, 3)).toBe(5); // expect output to be 5
Outcome
[RED] The test fails. The function doesn’t consider the second argument.
Step
We update the sum() function to sum both values.
const sum = (a, b) => {
  if (b) {    return a + b;  }  return a;
};

expect(() => sum(0, 0)).not.toThrow(); // expect sum(0, 0) to not throw an error
expect(sum(0, 0)).toBe(0); // expect output to be 0
expect(sum(2, 0)).toBe(2); // expect output to be 2
expect(sum(2, 3)).toBe(5); // expect output to be 5
Outcome
[GREEN] All green again! We now sum a and b when b has a value.
Step
Looking at the sum() function, we can make some improvements. Since we only consider number parameters, the only time b will be falsy is if the b is zero. We also know that adding zero to anything returns the same thing. So if b is 0, a + b would still be a.
const sum = (a, b) => {
  return a + b;};

expect(() => sum(0, 0)).not.toThrow(); // expect sum(0, 0) to not throw an error
expect(sum(0, 0)).toBe(0); // expect output to be 0
expect(sum(2, 0)).toBe(2); // expect output to be 2
expect(sum(2, 3)).toBe(5); // expect output to be 5
Outcome
[REFACTOR] All the tests are sill passing! There’s no other requirements of the sum() function, so we are done!
While this is an extremely simple example, the process is universally applicable to more complex cases. One thing you would have noticed is that we could easily refactor the code confidently because we already have test cases that test the requirements of the function. If the refactoring breaks any of those requirements, we would immediately know, and can change it back.
TDD with UI Components
I haven’t worked with the TDD approach for very long but I enjoy using it mostly for functions with clear requirements upfront. I also don’t enjoy using it for writing UI components like Vue.js components. I prefer to create the component and get it working as expected before writing the tests for them. This is due to the fact that UI components require time to be spent getting the UI to look like the designs, and not just adding content to the DOM, but also ensuring the pixels, spacing, colors, typography, etc. are just right.
Because of all this, I haven’t had much success following the TDD approach when writing tests for vue components. However, it works fine for other aspects of the application, like the actions, mutations, getters, etc.
Conclusion
In this post, we introduced the concept of unit testing, what it is about, and how we should approach writing unit tests for our code. Unit tests don’t have to be something you find difficult to write. Figuring out the things that make writing unit tests difficult is the first step required to writing useful, robust unit test suites.
In the next post, we would be going in-depth into unit testing, and we would be looking at how we can write unit tests for a Vue.js application. Don’t forget to subscribe to get notified when the next post is released.
Did you find this useful? Do you think there are better approaches to take, or questions? You can reach out to me on twitter @imolorhe.
Write about what you learn. It pushes you to understand topics better.
Sometimes the gaps in your knowledge only become clear when you try explaining things to others. It's OK if no one reads what you write. You get a lot out of just doing it for you.
@addyosmani