Unit testing JavaScript Applications - Part 2
May 22, 2020
In the previous post, we began talking about what unit testing is about, why we should consider writing unit tests, and how we should approach it. In this post, we will continue with some more practical things to consider and also writing some unit tests for a Vue.js application.
The Application


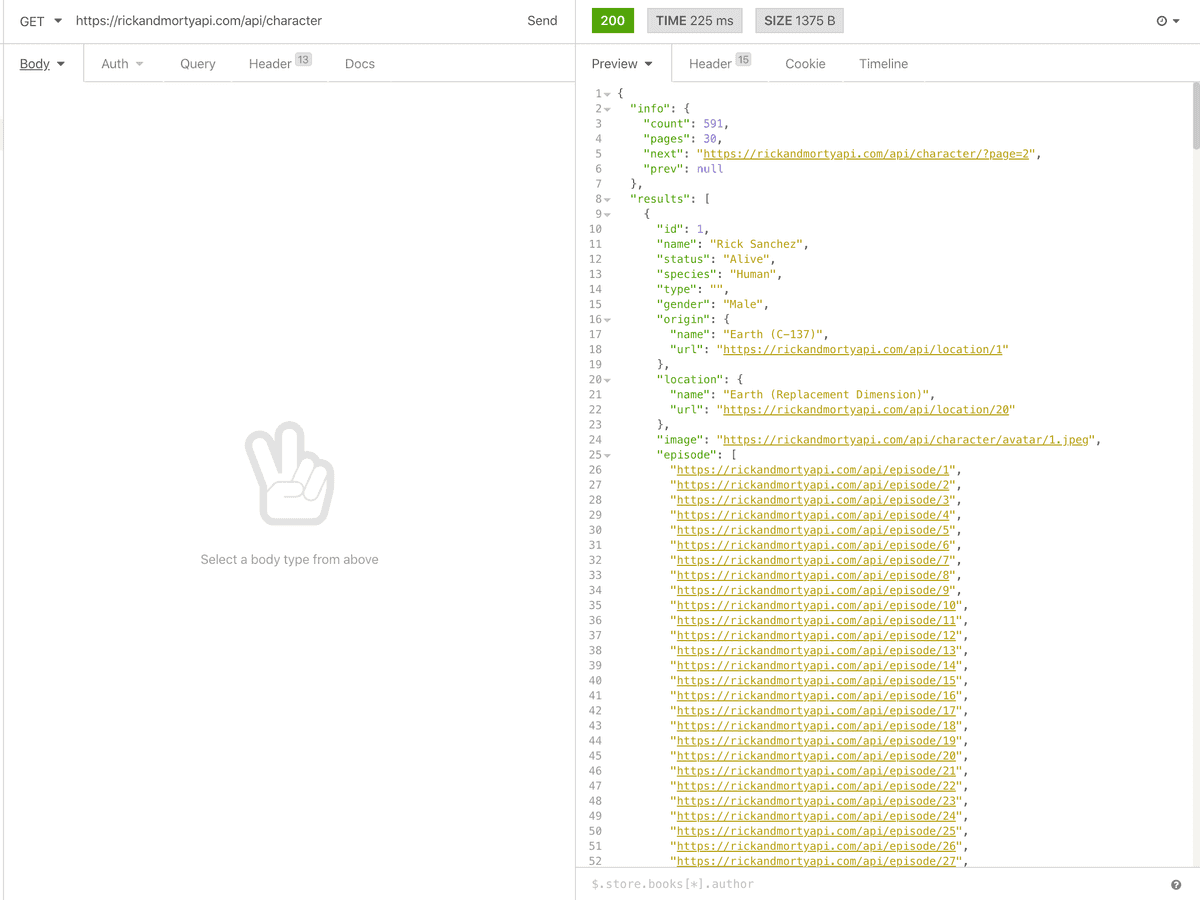
The application we would be testing is a very simple one. It fetches and displays a list of characters from the TV series “Rick and Morty”. It also displays the character details in a modal dialog. You can add a note to any character in the app, and the notes are persisted to a remote storage and available to anyone using the app.
You can checkout the full application with the tests in this repo: https://github.com/imolorhe/rick-morty
What is the application built with?
The application is built with the Vue.js as the JS framework consisting of a few views and components, bootstrapped using the Vue CLI tool. The application is written in TypeScript, compiled to JavaScript. The client state of the application is managed using Vuex, the de-facto state management library for Vue applications, routing managed by Vue router, styling based on Tailwind CSS, and axios for sending API requests. Nothing too fancy.
The application makes use of the Rick and Morty API (btw consider supporting them). Although the rickandmortyapi also comes with a GraphQL endpoint, we would be using the REST API, to keep things simple (REST is still the most common API format). If you would like to use the GraphQL API, you can make use of the Vue Apollo package to integrate GraphQL within your application.

The application uses JSONBin.io to create and store the notes as bins for retrieval later on.
As you can already tell, there are only two main views (pages) in the application: the character list, and the character details views. Other components in the app include: the Header component used across the pages, the Pagination component for the list view, and the CharacterCard component for displaying the basic info about each character in the list.
For the store, there are 3 actions:
getCharactersfetches the characters from the API for the current page, and commits thegetCharactersSuccessmutation with the result to the state.getNotesfetches the list of notes from the collection on JSONBin.io, and commits thegetNotesSuccessmutation with the retrieved notes to the state.addNotesends a request to JSONBin.io to create a bin containing the note in a collection, and dispatches thegetNotesaction to re-fetch the characters. Ideally dispatching thegetNotesaction shouldn’t be necessary at this step. You should be able to transform and commit the returned result from the request to create a bin without requiring to re-fetch all the notes, but for the purpose of this post, I have opted to dispatch thegetNotesactions.
There are also a few getters for transforming data from the state: characterList, getCharacterById, and getCharacterNotes.
Defining Test Cases
Irrespective of if you decide to follow the TDD approach or not, your tests should reflect the functional requirements of your component or piece of code. If you recall how we should think about the test cases from the first post in this series:
- I think from a blackbox perspective when determining the inputs and outputs of the piece of code to test, and I use that to create the test cases.
- I think from a whitebox perspective when I need to mock dependencies, since we need knowledge about the internals of the piece of code in order to be able to mock the dependencies.
- I think from a whitebox perspective when I want to cover all the logical execution flows within the piece of code, and I use this to add extra test cases, making the test suite robust.
Let’s use another example to illustrate these points. Consider the following class:
import pow from 'super-power';

class Squarer {
  lastComputed = null;
  #previousLastComputed = null;
  /**
   * Returns the square the specified input.
   * If a list is provided, returns the sum of the squared of the items in list
   */
  compute(val) {
    this.#previousLastComputed = this.lastComputed;
    this.lastComputed = val;
    return this.#getSquared(val);
  }

  #getSquared(val) {
    if (Array.isArray(val)) {
      return val.reduce((acc, cur) => acc + pow(Number(cur), 2), 0);
    }

    return pow(Number(val), 2) || 0;
  }
}

const squarer = new Squarer();
squarer.compute(2); // => 4
squarer.lastComputed; // => 2
This Squarer class has one private method #getSquared() and one public method compute(). The usage is simple: you call the compute(val) method with a val parameter, and it returns the squared value. Assuming we want to test this class as a unit of code following the steps above:
Create test cases from the inputs and outputs of the piece of code
The class only accepts input via the compute method. However, it accepts multiple input types: an array of values, or primitive values.
The output from the class includes the result of the compute() method call, as well as the public lastComputed property.
Although the class also contains #previousLastComputed property and #getSquared() method, those are private to the class and are not exposed outside the class definition. Hence, an external library or function can only interact with this class using the compute() method and the lastComputed properties. This is what we would consider as the public API/interface of the class, and that is what we consider.
Given that, we can define a test case for each of the following:
- input as number
- input as string
- input as array of numbers
It’s always a good practice to also account for edge cases when supplying inputs. For instance, you could add test cases for input as null, undefined, or an object. This could reveal possible misbehaviors within the code which you can then fix, and would lead to more consistent behavior.
Determine the dependencies of the code that would need to be mocked
In the class we have used a fictional module super-power for calculating exponents. For us to test this class in isolation (unit testing), we need to mock out the super-power library. For this step, we just note the things that need to be mocked. Actually mocking these dependencies would require specific implementations based on the testing framework in use. We would see how we mock this in jest in a coming section.
Create extra test cases covering all the logical execution flows
We use if and switch statements as well as logical (short circuit evaluation) and ternary (conditional) operators in JavaScript to create branches in the execution flow based on the specified conditions. These change the execution path of the code, hence could yield different results based on the applied conditions. It might not always be obvious (especially with ternary and logical operators) that there are multiple execution paths within the code. This means you could have tests for your code but still have some untested flows that could contain bugs because the tests don’t cover them.
Looking at the Squarer class example, you would notice we have one if statement in the private #getSquared method. You would also notice that the function does something different if the condition is met, and otherwise. There is also a short circuit evaluation used on the line with the return statement.
import pow from 'super-power';

class Squarer {
  // ...

  #getSquared(val) {
    if (Array.isArray(val)) {
      return val.reduce((acc, cur) => acc + pow(Number(cur), 2), 0);
    }

    return pow(Number(val), 2) || 0;  }
}

// ...
If pow(Number(val), 2) returns a falsy value (like '', 0, null, undefined), we return 0 instead. As you can see, this is not immediately obvious as it is in the same line as the return statement.
Luckily, we already covered the multiple cases in the if statement in the first step (input as array, input as number, etc). However we didn’t consider the short circuit with the logical OR operator. For a more robust test suite covering all cases, we should add a test case that ensures that execution path is covered as well. To do this here, we just need to ensure the returned value from the mocked pow() returns a falsy value, and the 0 should be returned.
Having followed those 3 steps, we would have all the test cases covered, without unnecessarily testing the internal API of our class.
Introducing Jest
We would be using the Jest testing framework for writing the tests for our application. Jest has gained a lot of popularity recently I believe because of its simplicity. Compared to other testing frameworks, it is very easy to get started writing tests in Jest with little or no configuration. Jest also comes with all the related tools regularly used for testing like mock functions, stubs, spies, assertions, snapshots, etc. Jest is also extendable with the ability to write your own custom runners, reporters, watch plugins, custom matchers, etc.
By default, jest runs tests from files ending with .spec.js, .test.js, .spec.jsx, .test.jsx, and their typescript equivalents (.spec.ts, .test.ts, .spec.tsx, .test.tsx). Jest also runs any .js, .jsx, .ts, .tsx files in any __tests__ directory. There are usually two patterns used to organize your test files: either storing the test files together in a __tests__ directory next to the source directory, or storing them right next to the source files.
Let’s write the test cases we have defined for the Squarer class.
// squarer.spec.js

import pow from 'super-power';
jest.mock('super-power', () => (x, y) => x ** y);

describe('Squarer', () => {
  describe('.compute()', () => {

    it('should square the number input', () => {
      const squarer = new Squarer();

      expect(squarer.compute(0)).toBe(0);
      expect(squarer.compute(2)).toBe(4);
      expect(squarer.compute(3)).toBe(9);
      expect(squarer.compute(10)).toBe(100);
    });

    it('should square the parsed number in the string input', () => {
      const squarer = new Squarer();

      expect(squarer.compute('2')).toBe(4);
      expect(squarer.compute('10')).toBe(100);
    });

    it('should return the sum of the square of the numbers in the array input', () => {
      const squarer = new Squarer();

      expect(squarer.compute([2, 4, 6, 7])).toBe(105);
    });

    it('should return zero for invalid inputs', () => {
      const squarer = new Squarer();

      expect(squarer.compute(null)).toBe(0);
      expect(squarer.compute(undefined)).toBe(0);
      expect(squarer.compute({})).toBe(0);
    });
  });
});
Within each test file, the test cases are organized into test suites. Test suites are used for grouping test cases related to the same piece of code. In Jest, test suites are defined using the describe() method while test cases are defined using the test() or it() methods. You can learn more about all the globals available in Jest tests here.
The tests above cover all the test cases we previously defined, including the edge cases like null and undefined. It also covers the short circuit to return zero, by providing an input that would cause the pow mock to return zero (the square of zero is zero). Jest allows us to mock the pow module using the jest.mock() method at the top of the file. Here, we define the module to return a function that returns the exponentiation result of the base (first parameter) and the exponent (second parameter).
Testing the Store
Now coming back to our application. Let’s write the unit tests for the store (actions, mutations and getters). We would write tests for just one function in each category, as the learnings can be applied to the others.
Action: getCharacters
Let’s look at the functional requirements for the getCharacters action:
- it can be called without parameters, or with an object containing the page number to fetch.
- it should fetch characters data from the rickandmorty API using the
rickmortymodule for the specified page. - it should commit the fetched data to the
getCharactersSuccessmutation.
import { getCharacter } from '@/api/rickmorty';

// ...
const actions {
  async getCharacters({ commit }, { page = 1 } = {}) {    const res = await getCharacter({ page });    commit('getCharactersSuccess', { data: res, page: Number(page) });  },  // ...
};

export default actions;
Now looking at the inputs and outputs (public interface) of the action:
- first parameter is passed by Vuex, so is a constant which we don’t control.
- we provide the second parameter to the
getCharactersaction, an object containingpage. - we can omit the second parameter and the default should be used instead.
- actions don’t return values, or their returned values aren’t used. Instead, they are expected to perform tasks like asynchronously fetching data from a server, saving a file to the disk, committing some mutation, etc. In that sense, the expected result (output) of an action is not the value it returns, but the actions it performs. This is usually the case for impure functions. Since they could have intended side effects, you want to make sure that the intended side effect happens as expected, which is the result/output of the function. For the case of the
getCharactersaction, you expect that thegetCharactersrickandmorty API is called to get the characters data, and you expect that thecommit()is called with thegetCharactersSuccessmutation and the characters data and page.
Note: Ideally the main side effect to be considered should be just the committing of the mutation, but we generally also test that the getCharacters method is called from the rickmorty module.
import actions from './actions';
import * as rickmorty from '@/api/rickmorty';
jest.mock('@/api/rickmorty');

describe('getCharacters', () => {
  beforeEach(() => {
    jest.clearAllMocks();
  });

  it('should commit the default page and data from the api', async () => {
    const commit = jest.fn();
    const data = { x: 1 };
    (rickmorty.getCharacter as any).mockImplementation(() => Promise.resolve(data));
    await (actions as any).getCharacters({ commit });

    expect(rickmorty.getCharacter).toHaveBeenCalled();
    expect(commit).toHaveBeenCalledWith(
      'getCharactersSuccess',
      { data, page: 1 }
    );
  });
  it('should commit the specified page and data from the API', async () => {
    const commit = jest.fn();
    const data = { x: 1 };
    (rickmorty.getCharacter as any).mockImplementation(() => Promise.resolve(data));
    await (actions as any).getCharacters({ commit }, { page: 3 });

    expect(rickmorty.getCharacter).toHaveBeenCalledWith({ page: 3 });
    expect(commit).toHaveBeenCalledWith(
      'getCharactersSuccess',
      { data, page: 3 }
    );
  });
});
We have written two test cases for the getCharacters action. In both test cases, we mocked the rickmorty.getCharacter() method to return some data, and we check that the method was called using expect().toHaveBeenCalled(). We also check that the commit() method was called with the getCharactersSuccess mutation and the data containing the response from the API and the page number. In the first case we don’t pass in the page number as a parameter to the action, but we expect the default page number to be used and committed.
One thing to note here is that you can only use the .toHaveBeenCalled()/.toHaveBeenCalledWith() assertions for jest mock functions (jest.fn()). In the test cases above, we can see that commit is a jest mock function. We also mocked the rickmorty module using the jest.mock('@/api/rickmorty') statement at the top. This is jest’s “automatic mock” ability. With that, every method or property from the rickmorty module is now a jest mock, and not the original implementation. So you can implement the mock to return specific outputs within a test case using the .mockImplementation() factory method.
We mocked the rickmorty.getCharacter() method to resolve with data in the test cases above, so anytime that method is executed within thw action, it would return a promise that resolves with data.
We also added a beforeEach() method within the test suite that calls jest.clearAllMocks(). This is already self-explanatory. Basically before each test case is run, the beforeEach() method is executed, and it clears all the mocks and their implementations (like those done using mockImplementation), ensuring that the mocks don’t have any stale data. This ensures the tests don’t get influenced by mocks from previous test cases.
You can find out other ways to mock modules here.
The same approach for testing this action can be applied to all the other actions as well. If an action simply dispatches another action, then check that the dispatch is called with the right parameters. If it calls some other API to fetch or store data, or perform some other task, then check that the API was called from within the action. Remember the API should be mocked in the test since its implementation is not part of the action being tested.
Side Note: You might be wondering why we have things like (actions as any) in the tests. This is so that typescript doesn’t throw errors. The type of actions should be ActionTree since it is the actions object, and you can’t directly call the functions in the actions (you would normally dispatch actions from your Vue components and Vue would handle calling the actions), so typescript doesn’t allow us use the action this way in the test, so we cast the actions to any to remove all the type checking. Similarly, (rickmorty.getCharacter as any) is used since the module is mocked and now has the .mockImplementation() method, but typescript doesn’t know that either, so we disable type checking there as well.
Mutation: getCharactersSuccess
Vuex mutations have only one job - to modify the state. Your mutations should be as simple as possible, and shouldn’t manage a lot of business logic. If you need to perform a lot of business logic before modifying the state, then you should consider performing those operations within an action, and only call the mutation when the state needs to be modified.
Let’s define the requirements for the getCharactersSuccess mutation:
- it should be called with an object containing
dataandpage. - it should store a list of character IDs.
- it should store a map/lookup table of the characters by their IDs for easy retrieval of single characters.
- it should store the
inforeturned from the API. - it should store the
pagein theinfoobject.
import Vue from 'vue';
import { MutationTree } from 'vuex';
import { State, CharacterDataModel } from './state';

const mutations: MutationTree<State> = {
  getCharactersSuccess(state, { page, data }) {
    const list: number[] = [];
    data.results.forEach((item: CharacterDataModel) => {
      list.push(item.id);
      Vue.set(state.characters.map, item.id, item);
    });
    state.characters.list = list;
    state.characters.info = { ...data.info };
    state.characters.info.page = page;
  },
  // ...
};

export default mutations;
Looking at the public interface of this mutation, the input is an object containing page and data. The output (expected result of executing this mutation) is that the state object is modified to contain the data as specified in the requirements. Similarly to the actions, the first input parameter to the mutation (state) is provided by Vue, and is not something the user of the mutation can control.
describe('getCharactersSuccess', () => {
  it('should set the correct state values', () => {
    const state = {
      characters: {
        info: {},
        list: [],
        map: {},
      },
    };
    const payload = {
      info: { reqDetails: 1 },
      results: [
        {
          id: 1,
          name: 'First',
        },
        {
          id: 2,
          name: 'Second',
        },
      ],
    };
    (mutations as any).getCharactersSuccess(state, { data: payload, page: 1 });

    expect(state.characters.list).toEqual([1, 2]);
    expect(state.characters.map).toEqual({
      1: {
        id: 1,
        name: 'First',
      },
      2: {
        id: 2,
        name: 'Second',
      },
    });
    expect(state.characters.info).toEqual({ reqDetails: 1, page: 1 });
  });
});
There isn’t much variation in this mutation. It only accepts one type of data, and always modifies the state in the same way. No conditionals, no short circuiting, no default values. Therefore we only need one test case to cover this mutation.
We call the mutation with a state object and an object containing data and page.
Then we check that the state contains a list of character IDs.
We check that the state contains a mapping of character IDs to characters.
We check that the state contains the info object as well as the page property.
One thing to note is the use of .toEqual() instead of the more common .toBe() assertion. The reason for this is that we want to compare the values based on their value, and not by reference. The .toBe() would use the strict comparison === to compare the two values, which means two objects containing the same sets of data would not be equal since they have different references. .toEqual() recursively compares all the properties of the values instead of just checking their referential identity.
Should we mock
Vue.set? If we want to be as strict as possible, then I believe you should mock it. However, in this context,Vue.setsimply assigns a value to an object property, like doingobject.a = 1;. For me, its presence in the code is as normal as native JavaScript methods and as such, I don’t really consider it as something that needs to be mocked, but that might just be a bias on my part. Either way, mocking it is rather easy:
jest.mock('vue', () => {
  return {
    set(target, prop, value) {
      target[prop] = value;
    },
  };
});
Getter: characterList
Vuex getters return a slice of the state, or data derived from the state. Getters are similar to the computed properties in Vue components in that they are cached and reactive, so they only get computed whenever the input changes, in this case the input is the state. They can either return a value or return a function.
We would be looking at the characterList getter which returns a list of character data based on the list of character IDs and the mapping of character ID to character data we already have in the state, from the getCharactersSuccess mutation above.
The requirements of the characterList getter are very simple:
- it takes the state as the only argument which is provided by Vue and the user wouldn’t have control over it. So using it in the vue context, the user would provide no parameter.
- it returns an array of character data based on the list of character IDs and character data mappings.
import { GetterTree } from 'vuex';
import { State } from './state';

const getters: GetterTree<State, State> = {
  characterList(state) {
    return state.characters.list.map(id => state.characters.map[id]);
  },
  // ...
};

export default getters;
The getters are generally pure functions, so we know that the output is only dependent on the input, and there is no side effect either. Looking at the public interface of the characterList getter, it accepts one input (state) and always returns an array of zero or more character data.
const state = {
  characters: {
    list: [1, 2],
    map: {
      1: {
        x: 1,
      },
      2: {
        y: 2,
      },
    },
  },
};
describe('characterList', () => {
  it('should return list of character data', () => {
    expect((getters as any).characterList(state)).toEqual([
      {
        x: 1,
      },
      {
        y: 2,
      },
    ]);
  });
});
One test case is sufficient for this getter. We pass a state object as a parameter to characterList, and we assert that the returned value of the getter is an array of character data matching the data in the state.
Conclusion
In this post, we illustrated the approaches of unit testing using more examples. We also introduced the application we would be using as a case study in this series and looked at how we can write tests for the various parts of the store. From the tests we have written so far, we see how following the testing approach and considering the public interface (inputs and outputs) of the piece of code helps us to define the test cases without unnecessarily testing internal implementations that make the tests harder to maintain.
As a reminder, you should get your tests to fail at least once to ensure you aren’t getting false positives and that your tests are functioning properly.
In the next post, we would dive into writing unit tests for Vue components and see how we can make use of the vue test utils to make the testing process of vue components easier.
For reference, the source code of the application we are working with is located here: https://github.com/imolorhe/rick-morty
Did you find this useful? Do you think there are better approaches to take, or questions? You can reach out to me on twitter @imolorhe.
Write about what you learn. It pushes you to understand topics better.
Sometimes the gaps in your knowledge only become clear when you try explaining things to others. It's OK if no one reads what you write. You get a lot out of just doing it for you.
@addyosmani